

What you should do in order to create a seller account on Amazon
This is a guest post by Moran Matan, who’s an expert Amazon seller. Moran is also the founder of Electronic Trade Winds, which provides professional consulting for Amazon stores.
Selling on Amazon can be highly lucrative. In this guide, I will cover the bases, i.e., how to become an Amazon seller, making your first listing, and setting the right price. This guide was written to help you save time, so I wrote it as a down to earth tutorial. More advanced practices like advertising, promotion, or search terms will be covered in future articles.
Step #1
Go to amazonservices page and press the “Start selling” orange button.
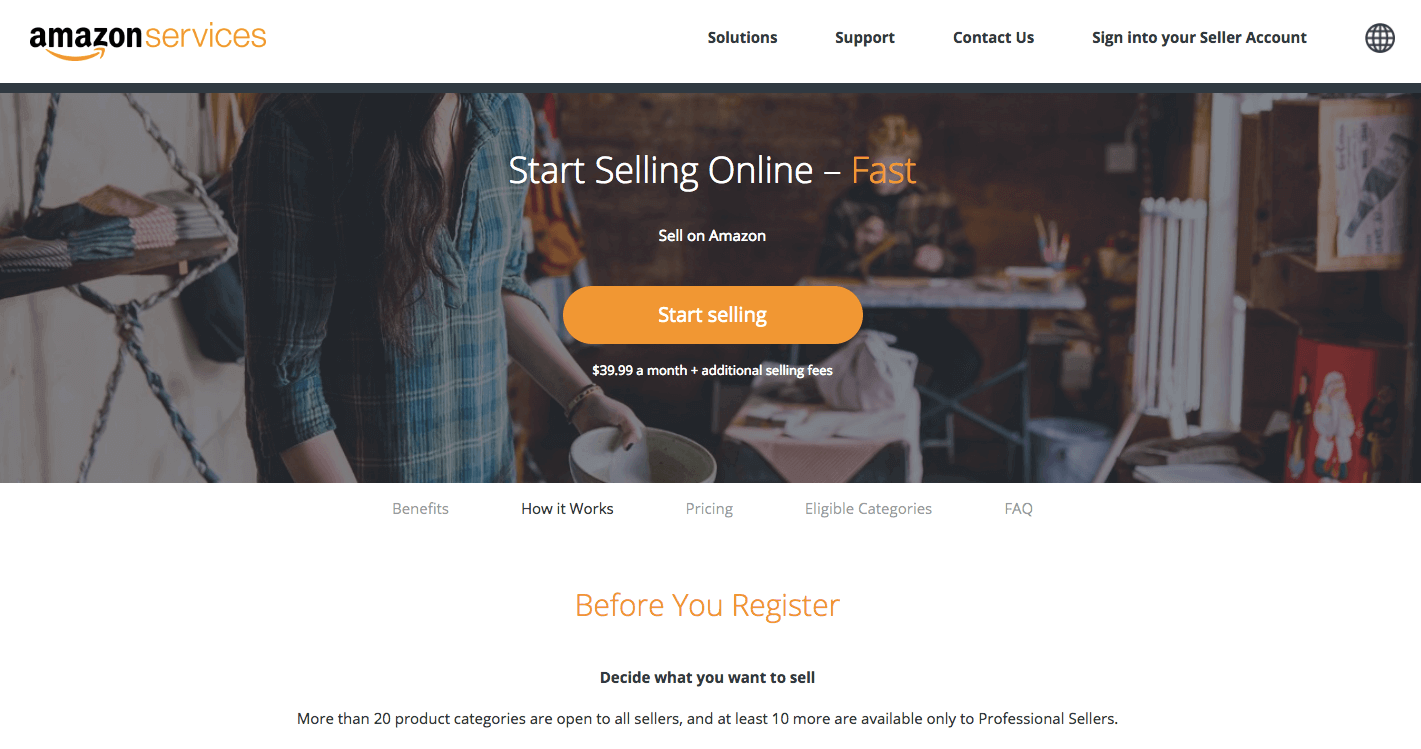
After that, you will be asked to enter your account name, email address, and password.
Step #2
Enter your business or legal name, address, mobile phone number, credit card number, and your bank account and tax information.
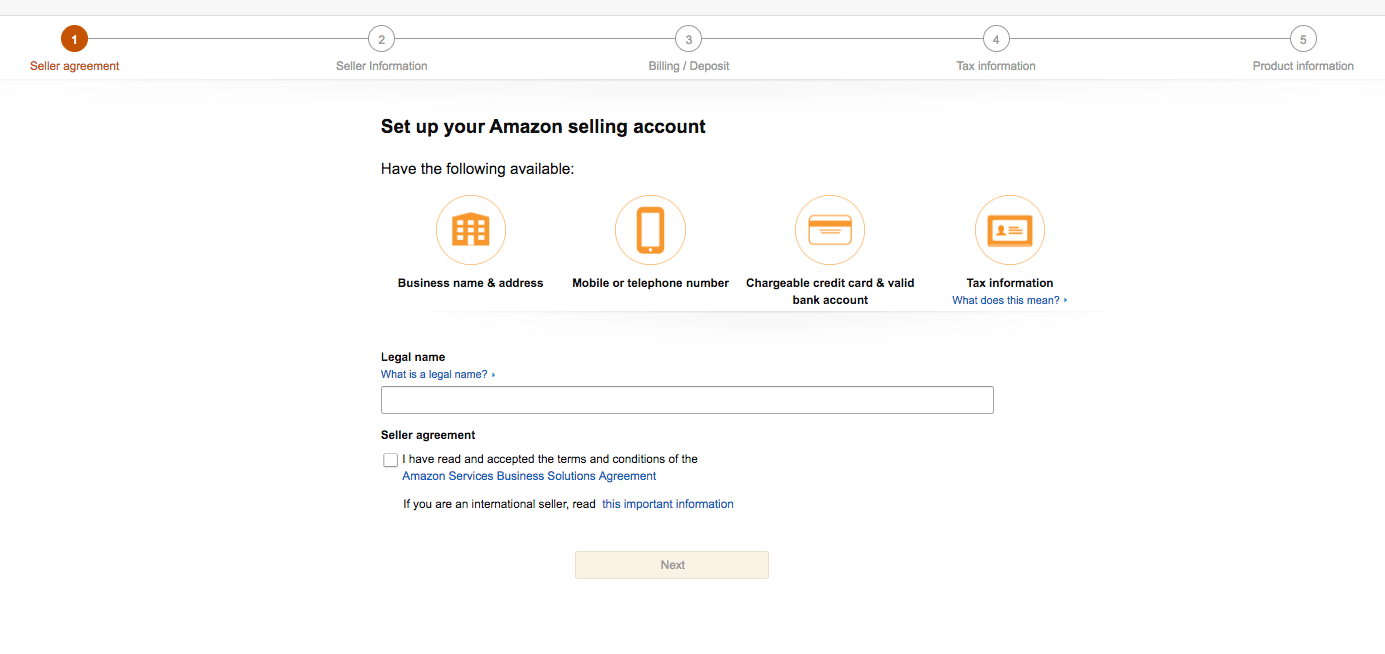
In order to save time, it’s better to choose in advance the associated phone number, bank, and credit card.
The credit card will then be used to pay Amazon for your store, fees, ect. It can also be used if you don’t have a sufficient balance to make a payment.
- Business or Legal Name: If you are registering as an individual seller, enter your full name. If you are registering as a business, enter the business’ registered name as well as your full name (e.g. Seller Inc – John Smith).
- Bank and Credit Account: You will need a bank account that can receive electronic transfer payments from Amazon along with a chargeable credit card. If you live and sell in the US, UK, any country in the eurozone, Australia, New Zealand, India, Hong Kong or Canada, you should not have a problem. However, if you live outside of the US and want to sell there (or the other way around), you will need a bank account and credit card that will work with Amazon. While most credit cards will do, local banks generally won’t. In such cases, you can use online payment providers such as Payoneer, or use a bank account in the county you want to sell to.
- Address, Display Name, and Phone Number Confirmation:
- The display name you choose will appear on all your Amazon listings, so you should pick a name that best reflects your products and store – but don’t worry, you can always change it later via “Account Info” in your Seller Central Settings.
- In order to approve your address, you will need a utility bill or a bank statement with your address. Additionally, if you are going for the Professional Plan, you will start paying 39.99 usd per month… even if you did not complete your registration. So, it’s better to have it ready in advance.
- Tax Information: This part is for US taxpayers so take this part very seriously because every penny you profit is well documented. If you are not a US taxpayer, be sure to take care of this part with your own local tax agency.
- Choosing a Seller Plan: This issue should (and will) have its own article. However, in short, the Professional Plan offers a lot of working tools, but it costs 39.99 USD a month. Conversely, the Individual Plan is free, but you pay an extra 0.99 USD per sale in addition to all the selling fees. So, if you plan to sell more than 40 items a month, you should take the Professional Plan, and vice versa.
Create Your First Amazon Listing
After your account is up and running, you will need to start uploading listings of items you want to sell.
There are 3 basic ways to create a listing:
- Find the item you want to sell via Amazon search
- Find an item you want to sell via Seller Central
- Create a new item
While options one and two are quite similar, option three is totally different. In options one and two, you only need to know what you want to sell, its price, condition, and whether you want to ship it to the customer yourself or have Amazon do it for you.
In option three, on the other hand, you have to build a new listing from scratch. This option will give you the option to do a highly effective listing, but it requires a lot of practice and knowledge about Amazon, and I won’t recommend a new Amazon seller to start with this option.
Find the Item You Want to Sell via Amazon Search
If you found an item that you want to sell on Amazon, you can add it to your account via the “Sell on Amazon” button.
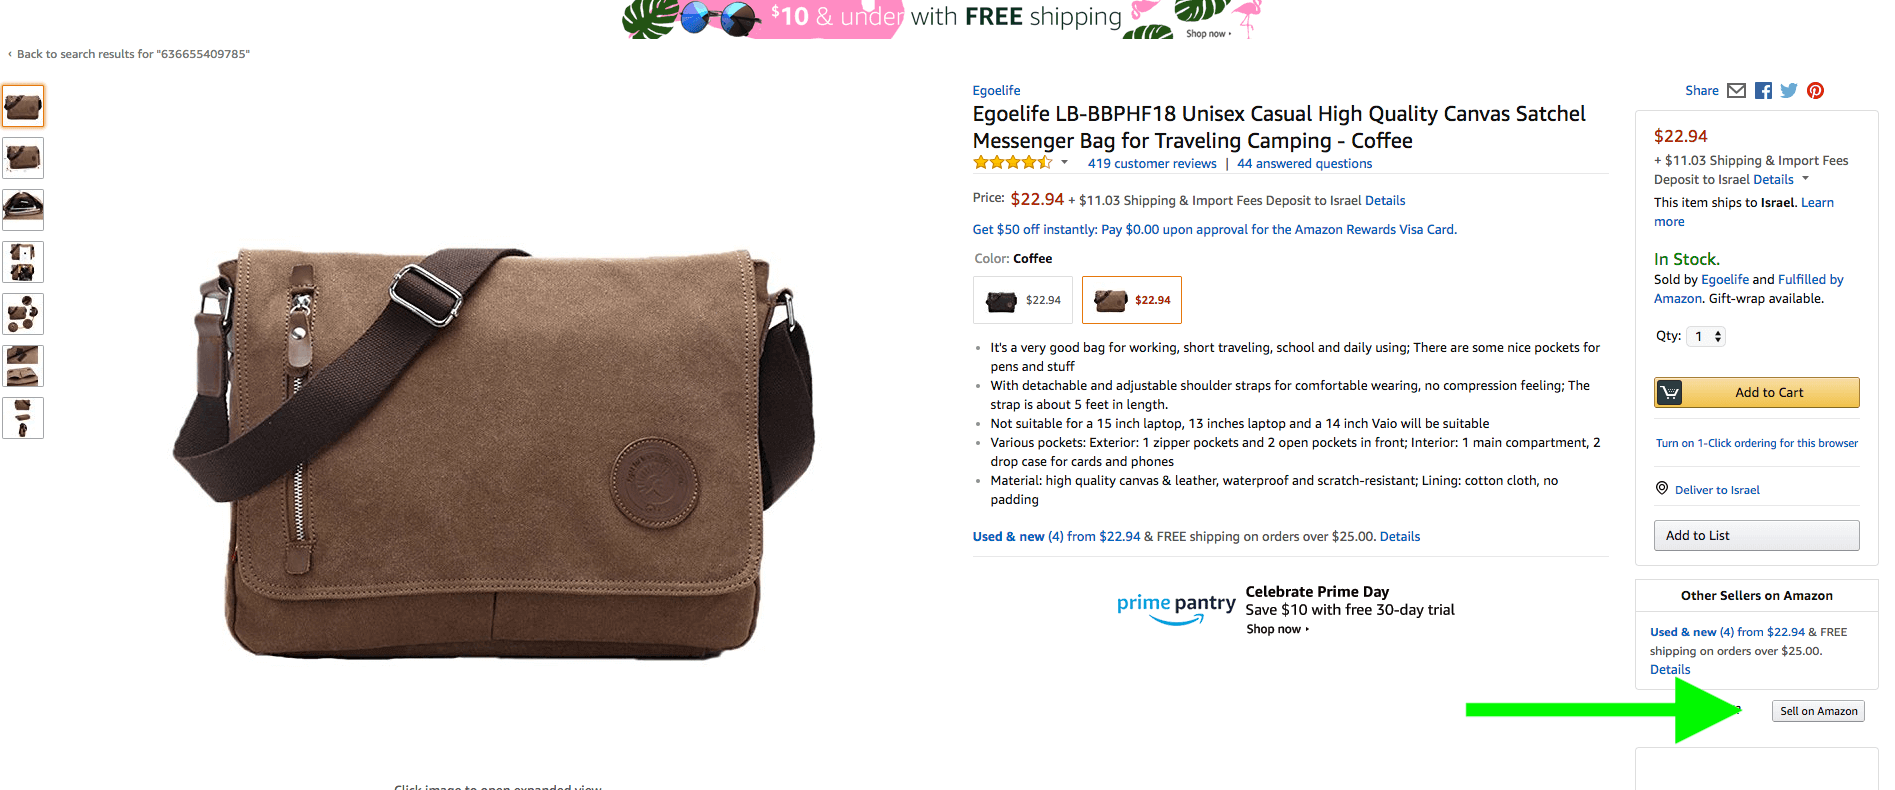
Please take note that you will not be able to list in all the item categories at the beginning. Some categories, such as toys, are only available after you gain sales record.
You should also note that by clicking on “sell on Amazon” your item will be listed in the same marketplace you found it on. By using this method you will not be able to list on Amazon.com, for example, an item listed on Amazon.co.uk.
After pressing the “Sell on Amazon” button, you will be directed to this page:
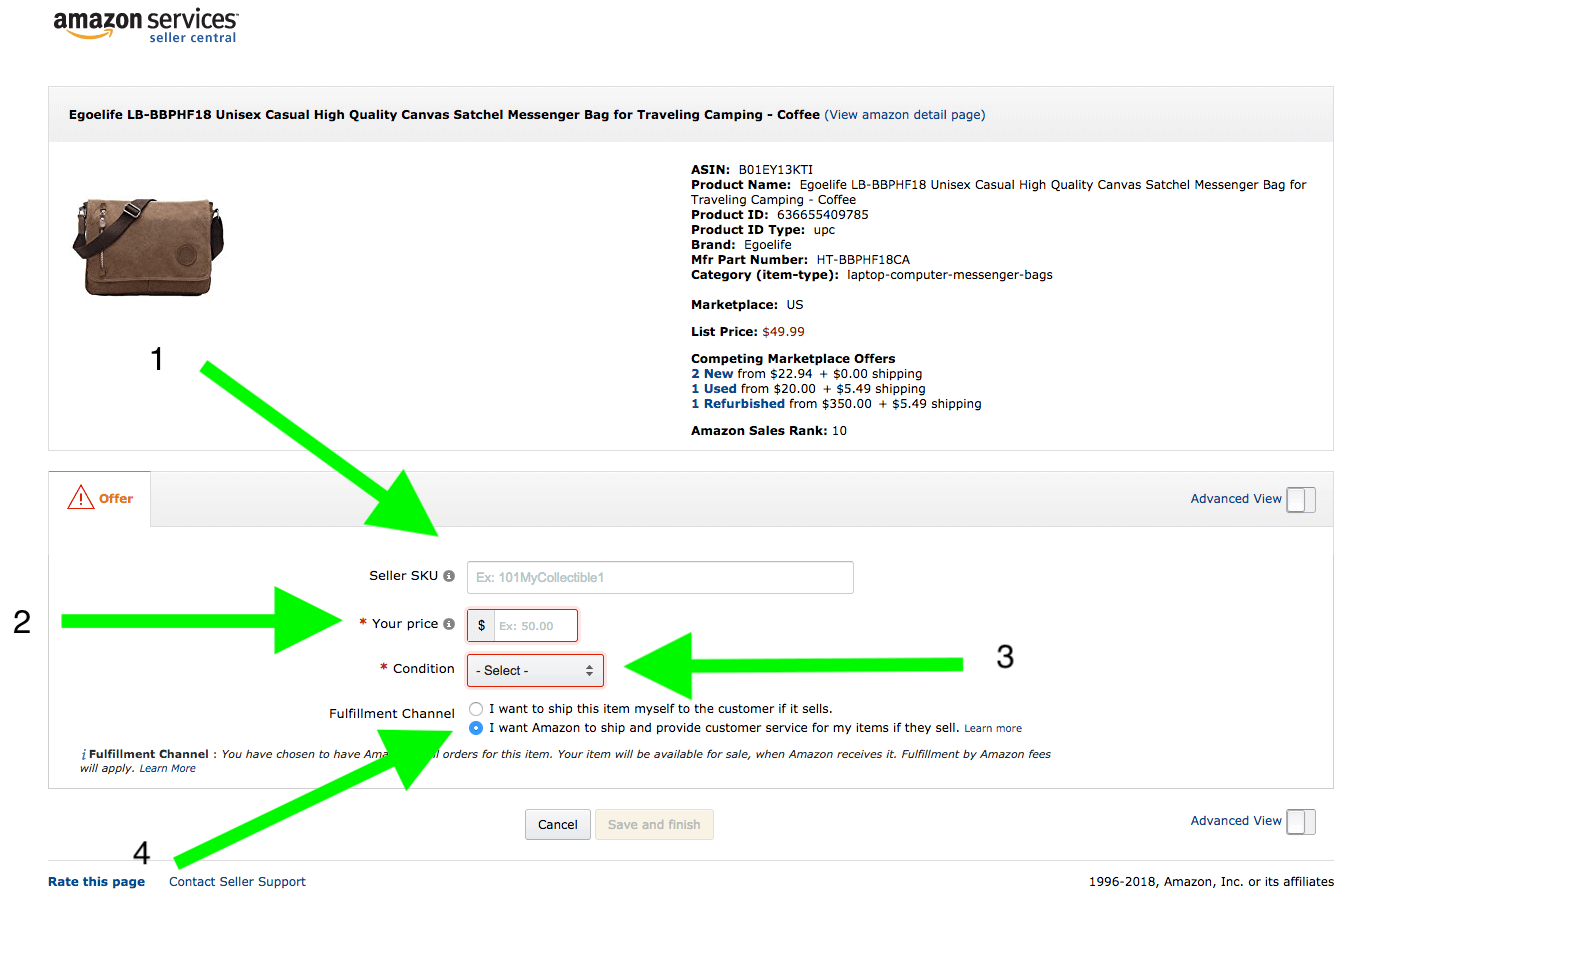
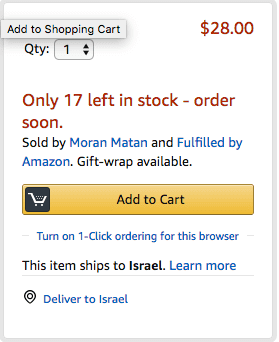
The numbered arrows point out the four things you need to fill in to list your item:
- Seller SKU (Stock Keeping Unit): This can be a random sequence of characters determined by Amazon or something that will help you keep track of your inventory, sales, fees, etc. An example would be something like Harry_Potter_pen_green.
- Your Price: Here is where you set your selling price (not including shipping). I will go back to this one later.
- Condition: Is the state of the item you are selling, i.e., New, Refurbished, Used – Acceptable, Used – Good, Used – Like New or Used – Very Good. Be sure to choose the right one because changing it, later on, could be a headache.
- Fulfillment Channel: You can choose to fulfill the item yourself or ship it to Amazon and have them do it. This decision is important and can be a bit complicated. Thus, I will write about it in a future blog.
After you’re done with those four stages, your listing will be live after about 15-30 minutes. Do not report it until the time had passed as you can list it multiple times. If this happens, you will be spending a lot more than 30 minutes trying to fix this problem.
Find the Item You Want to Sell via Seller Central
Using this option, you already have an item in mind, its title or ASIN (Amazon Standard Identification Number), and you care to do it from your Seller Central.
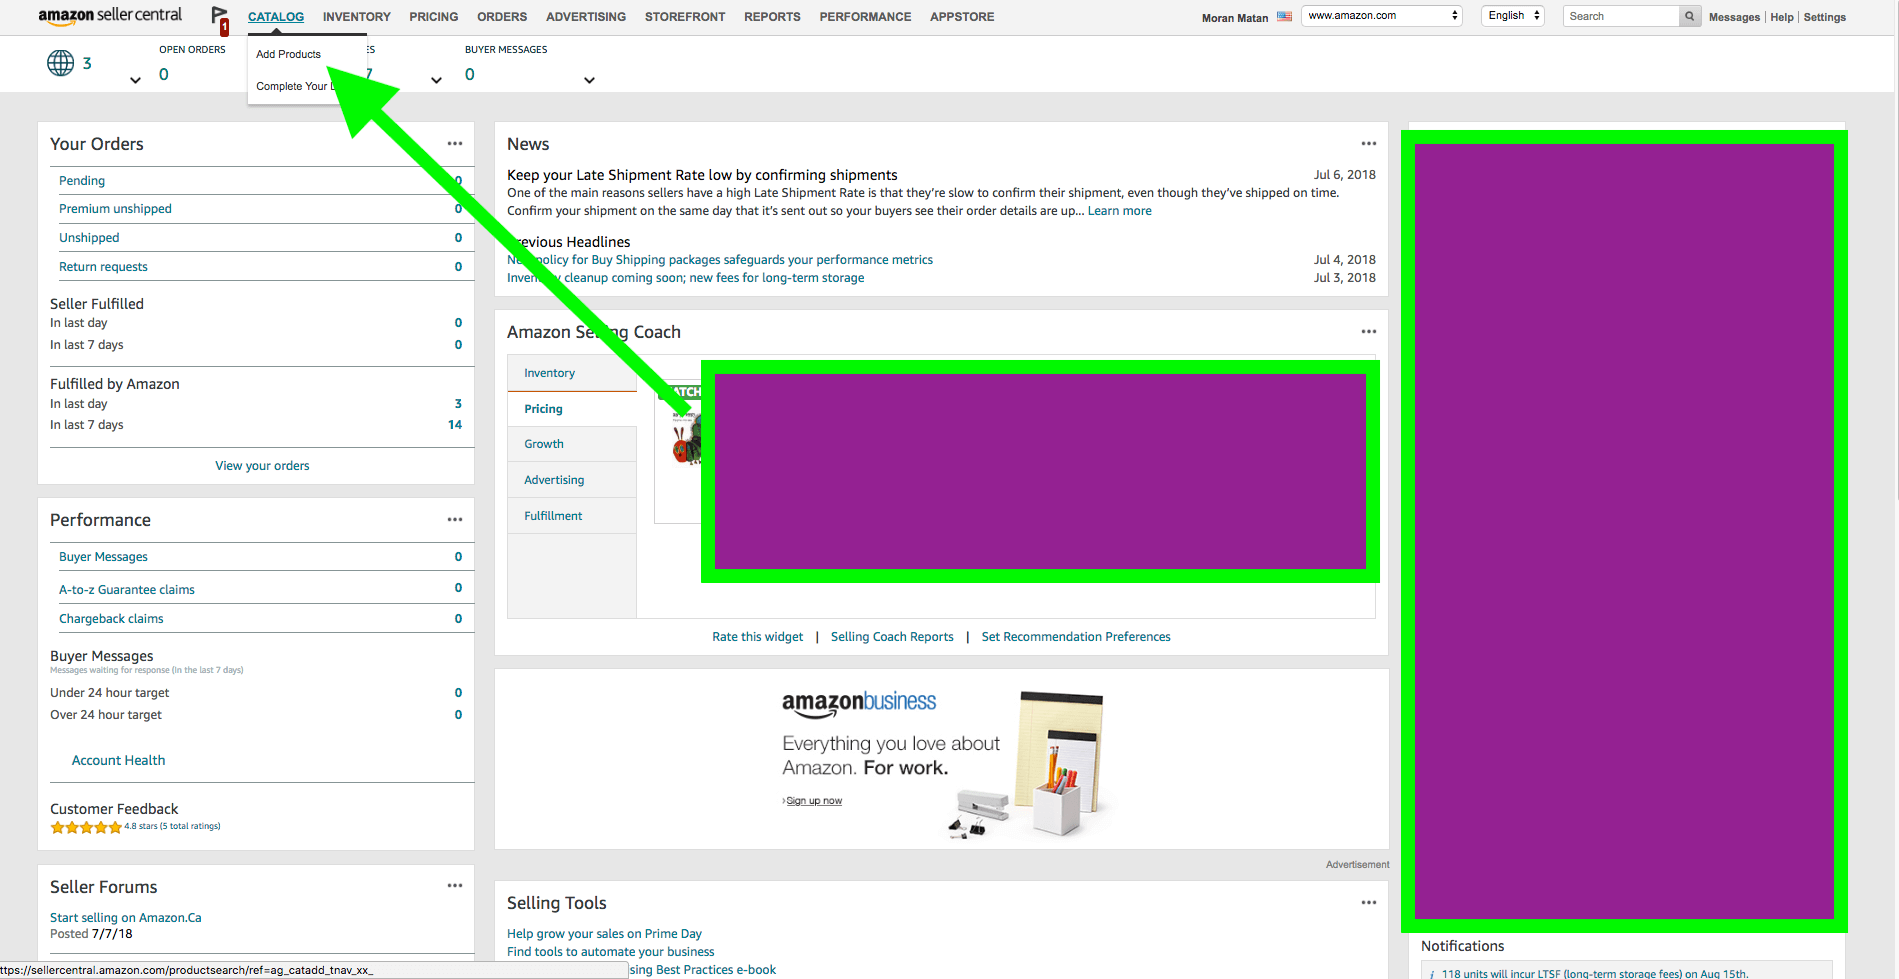
Let’s go back to the last example: ASIN 636655409785.
The first thing you will need to do is click on CATALOG (from the top menu of your Seller central homepage) and press the “Add Products” option from the drop-down menu.
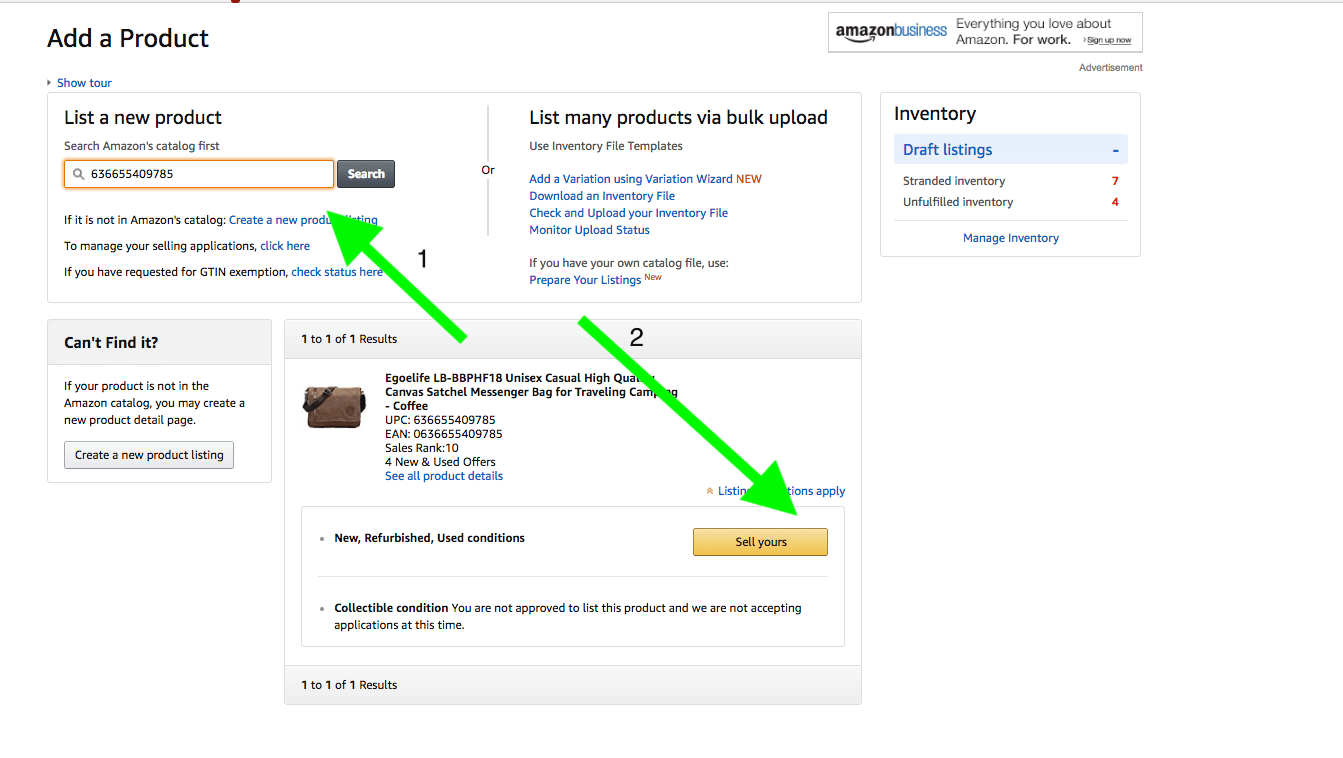
On the next page, you will need to enter the ASIN (or title) of your product (arrow number one below) and press the yellow “Sell yours” button (arrow number two).
An advanced step, true to the two options, is the “Advanced View” option. The most important one is the Handling Time which indicates the number of days you need to ship an item after it is paid for. The default is one or two days; however, I strongly recommend setting it for a higher number that you may actually need. This is because late shipments can damage your account’s health or even cause its shut down. As a general rule of thumb, I would set the number of days as plus two of what you actually need. By using this method, you will have some maneuver time.
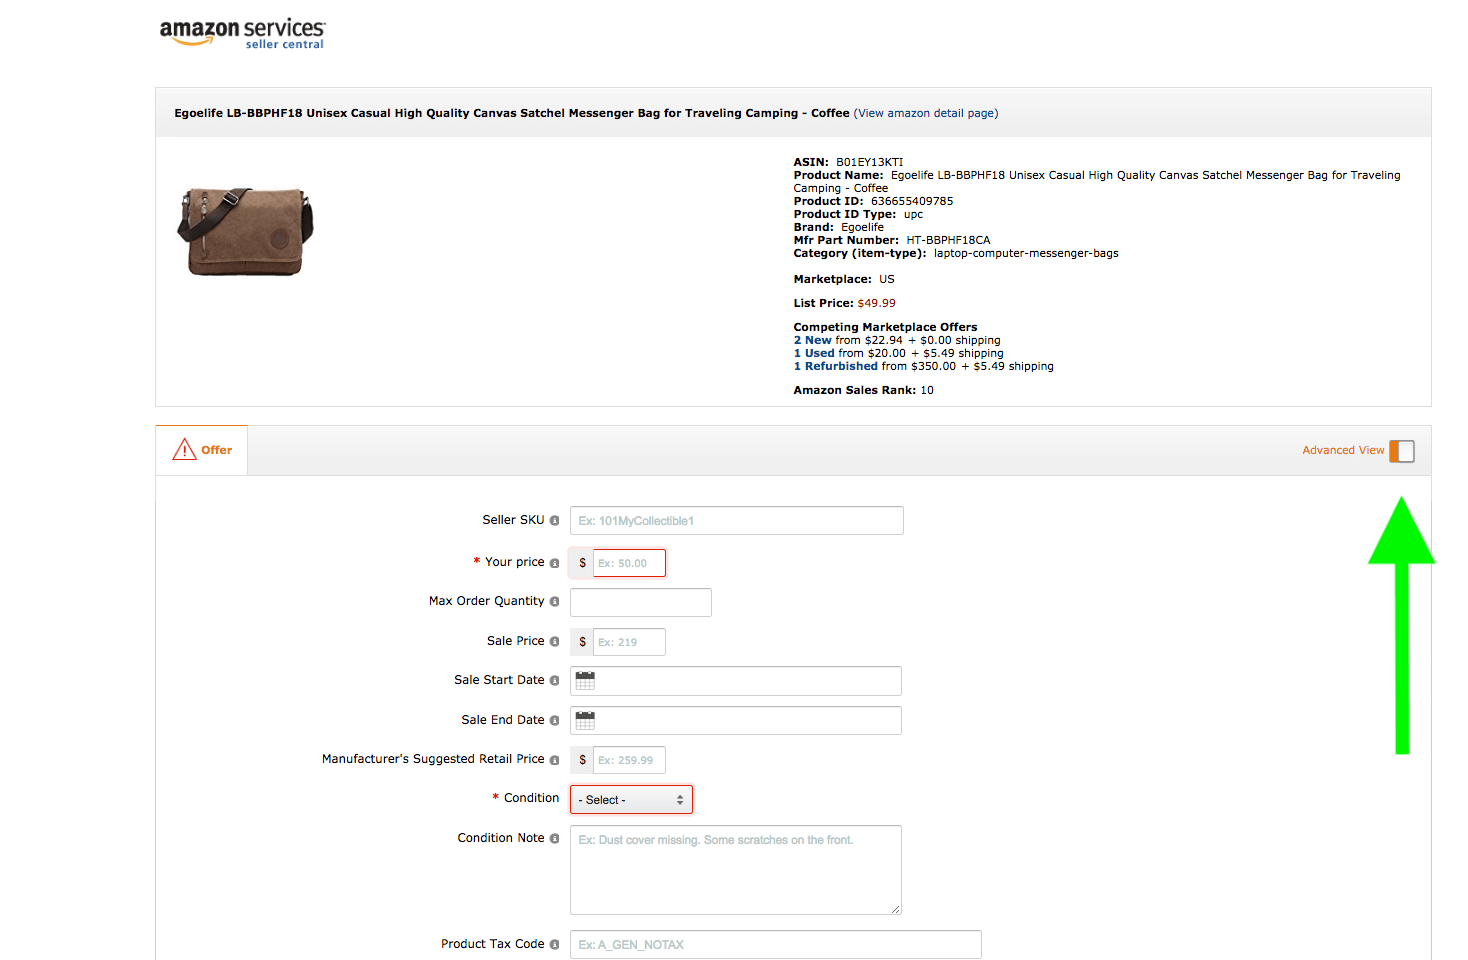
Moreover, you will find the following advanced options:
-
- Max order quantity: The maximum amount of items you can ship in one order.
- Sale price: If you want to do a sale, you can pick a lower price. The buyers will see the original price and the reduced price on Amazon.
- Sale start and end date: You will need to set those if you want to create a Sale.
Summary
I covered a lot of subjects in this article; however, I had not written about many important operations such as advertising, seller rank, promotions, storage, shipments, and so on.
I do hope to do them soon, and I will be happy to answer any questions you may have.